How to Clean Headlights: 7 DIY Methods That Work
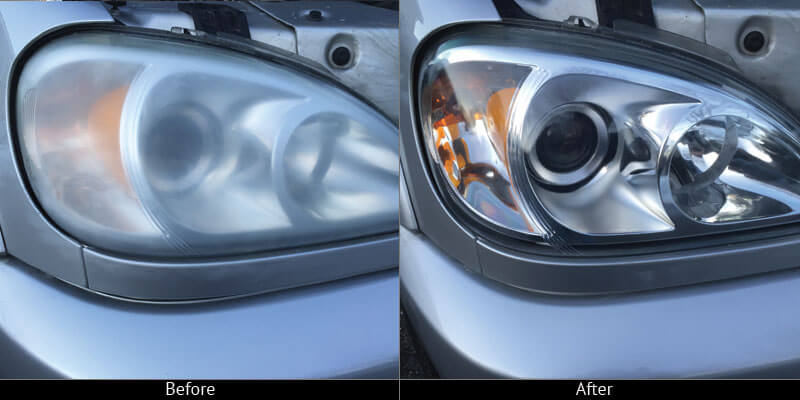
Have you noticed that your vehicle’s headlights have lost their intensity and clarity while you’re driving at night? It may be due to hazy or dull headlights. This both limits your visibility and the ability for oncoming traffic to see your car. The best way to clean headlights is to hire the auto detailer since they have the knowledge, experience, high-quality products, and cutting-edge technology. But, if you still want to try the DIY headlight restoration route? This guide illustrates how to clean car headlights on the vehicle with the 7 proven methods.
1. How to Clean Headlights with Toothpaste
Toothpaste is a good alternative to traditional car detailing supplies. It’s mildly abrasive, making it a great option for cleaning headlights that are beginning to look dim or foggy. Set aside about 5 minutes per light when applying this DIY headlight restoration method.
You’ll need: car wash soap, masking tape, disposable gloves, car washing clothes, toothpaste, and paint sealant.
- Step 1 – Clean the headlights thoroughly with the regular car washing supplies. Let them to air dry for a few minutes before you move to step two;
- Step 2 – Cover the areas around the headlights with masking tape. This will protect the paint and plastic parts from the drying and mildly abrasive toothpaste;
- Step 3 – Wear disposable gloves and add a little toothpaste to a damp cleaning cloth. Rub each headlight firmly, putting toothpaste and small amounts of water as you go. Spend about 5 minutes on each light to achieve the desired effect;
- Step 4 – Rinse headlights with clean water. Allow them to air dry before buffing headlights with a clean cloth;
- Step 5 – Apply a small amount of paint sealant to the headlights. This will protect the headlights and keep them looking clean longer.
2. How to Clean Foggy Headlights with Vinegar
Similar to the toothpaste technique demonstrated above, vinegar and baking soda is an excellent DIY option for restoring headlights. The homemade solution works best on very foggy or oxidized headlights. Here’s how to clean cloudy headlights utilizing this method.
You’ll need: clean microfiber cloths, car wash soap, distilled white vinegar, box baking soda, and a clean container.
- Step 1 – Clean the headlights with water, car wash soap and cloth. Let them to air dry for a few minutes before moving to the second step;
- Step 2 – Mix one part baking soda with two parts distilled white vinegar in a clean container. Shake or stir the mixture to combine;
- Step 3 – Dip a microfiber cleaning cloth in the mixture. Rub it onto each headlight for a few minutes. Add more of the cleaning mixture as you go if necessary;
- Step 4 – Rinse the headlights with clean water and allow them to air dry. If needed, repeat the third step, always rinsing your headlights after each application of the baking soda and vinegar mixture.
3. Cleaning Headlights with Headlight Cleaner and Automotive Polish
The next common clear headlight restoration practice is using a headlight cleaner as a primary cleaner and then an automotive polish to eliminate the haze.
You’ll need: headlight cleaner, paint tape, automotive polish, protective gloves, rotary buffer, microfiber polishing cloths, clean microfiber towel, and a bucket of water.
- Step 1 – Because you’re going to use a glass cleaner to remove debris, the first step is to tape off the surrounding area of the headlight cover;
- Step 2 – Spray the surface of the headlight with the glass cleaner – liberally. Allow it soak for a few seconds, then remove with a clean microfiber cloth;
- Step 3 – You’re going to buff the headlight surface in step 3. You do it by hand, but you can also utilize the orbital polisher for more consistent results;
- Step 4 – The final step is to rinse the surface of any excessive polish. Dry with a fresh microfiber towel and check. Repeat the step as required, but just once or twice. Excessive damage on the surface may not be eliminated and will need a replacement;
- Step 5 – Just like the toothpaste technique, it’s best to apply some protective coating on the freshly cleaned headlight cover. Paint sealant is the easiest and most cost-effective. With a car wax, you’ll need to reapply every few months. A paint sealant, however, can last up to 3 years.
4. How to Clean Headlights with WD40
To defog the headlights using WD-40 as your headlight lens restorer, follow these easy steps:
You’ll need: a bucket of water, car wash soap, a clean cloth, and WD40.
- Step 1 – Wash the headlight lens with water and soap;
- Step 2 – Shake a can of WD40 and spray it onto the whole headlight lens.
- Step 3 – Wipe off with a clean cloth.

5. The Bug Spray Method
Professional detailers don’t highly recommend this method. The DEET in bug spray removes the oxidation of headlights. Still, this is a fast and easy way to enhance the appearance of the plastic instantly. The DEET in the spray works since it melts the film on the plastic and its outer layers. While it has results, they’re temporary. The cloudy and dull appearance will return within a month and starts within days.
You’ll need: bug spray and a towel.
- Step 1 – Apply the bug spray with a towel and never sprayed directly on the headlight;
- Step 2 – Rinse the bug spray residue from the clean headlight lens.
Caution – Although the car headlight is rinsed, the chemical residue can still run during wet weather and damage the paint or clear coat with which it comes in contact.
6. Wet Sanding
The wet sanding method produces good results and is a permanent remedy for all purposes and intentions. However, consider that this technique is labor and time-intensive and involves some steps that you may not feel comfortable attempting yourself.
The first thing to note with this method is that your car will need to stay non-operational for at least 24 hours. Next, you will have to perform the final step without any wind intrusion so that no dirt or dust will come in contact with the headlight lens.
7. Use the Headlight Restoration Kit
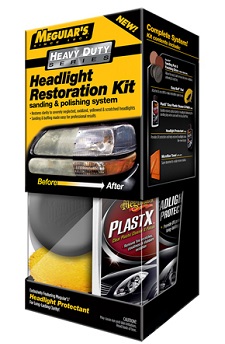
There are many headlight restoration and cleaning kits on the market. Some products are better than others. We recommend reading reviews based on customer experiences to help you decide what option is right for you.
These kits vary hugely in the compounds used and the practices they entail. Instructions for each product are included with the packaging and go from applying a compound and buffing the residue to using abrasive techniques and compounds for a better result.

Why Do Headlights Get Cloudy or Fogy?
Even though foggy headlights can look like cloudy ones, the two aren’t necessarily the same thing. The headlights may be foggy due to condensation. Halogen bulbs, unlike LEDs, naturally heat up as they are left on overtime. Particularly in humid conditions, when the bulb cools off, water vapor in the surrounding air condenses, making a foggy-looking headlight.
Although headlights were initially made from glass, modern ones are made of durable plastic, like polycarbonate. But, just like rubber parts, such as tires, plastic is vulnerable to ultraviolet rays. And being outside the vehicle, headlights are exposed to the elements, as well. During the time, sunlight, road debris, acid rain, chemicals, bug guts damage and yellow the plastic.
Why Restore My Headlights?
Not only does the lackluster look of the headlights downgrade the overall appearance of your car, but more importantly, as we said, the poor condition of the headlights impacts the visibility while driving at night.
The NHTSA revealed a two-fold issue related to damaged or dirty headlights, making a lower level of light on the roadway and inadequately diffusing required light from the driver’s perspective, reducing forward visibility. Simultaneously, these problem headlights project higher light levels toward oncoming vehicles, which can momentarily impede an oncoming driver’s functional eyesight.
